Recovering from a failed SSD on linux
Down with the spinning disks! And hail the SSDs!
That's about what happened the last time I upgraded my laptop. SSDs were just so much faster, energy efficient, and quieter that I couldn't stand the thought of remaining loyal to the trustful spinning disks.
So... I just said goodbye to a few hundred dollars to welcome a Corsair Force GS on my laptop, and been happy ever after.
Or so I thought. Back to the hard reality: last week my linux kernel started spewing read errors at my face, and here is a tale of what I had to do in order to bring my SSD back to life.
The Symptoms
It all started on a Friday morning with me running an apt-get install randomapp on my system.
The command failed with an error similar to:
# apt-get install random-app-whatever-it-was
...
(Reading database ... dpkg: error processing whatever.deb (--install):
dpkg: unrecoverable fatal error, aborting:
   reading files list for package 'libglib2.0-data': Input/output error
E: Sub-process /usr/bin/dpkg returned an error code (2)
where libglib.20-data had nothing to do with what I was trying to install.
Fear pervaded, and next thing I did was run dmesg to see if the kernel
had anything to say about the problem:
# dmesg
....
[1841.216697] end_request: I/O error, dev sda, sector 5246153
...
and sure enough, here it was. Trying to read the accused file surely returned Input/Output error:
# cat /var/lib/dpkg/info/libglib2.0-data.list
... Input/output error
Luckily enough, most of the system was still accessible and usable, so it couldn't be so bad after all, or could it?
One more backup
I was commuting to work when this happened, and didn't have with me anything I could use for a backup. So, I did the only thing I could reasonably do: put the laptop in suspend to RAM, back in my backpack, and hope it would survive until I got home.
Once home, I resumed it from RAM (which worked without issues), and did one more
backup with rsync (to copy all the files),
and dd (to have an image of the partitioning scheme and so on).
Creating an image with dd turned out to require a bit more work than expected: the default
parameters of dd make it slow, make it fail on first error, and don't really show what's
happening. Here is the command line I ended up using:
# dd if=/dev/sda of=./backup.img bs=104857600 conv=noerror
... where bs=... has been increased to work 100 Mb at a time, and conv=... instructs dd to ignore errors. From another prompt, I also run:
# while :; do killall -USR1 dd; sleep 1; done;
To have dd output statistics once a second.
Don't forget to either boot on another recovery
disk (USB key or similar) or mount all the file systems read only (mount -o ro / and all
other partitions) before backing up with dd. Otherwise you will back up a file system
with changes still in memory.
Assessing the damage
Once I sorted out the backup situation, it was time to recover.
But first thing I wanted to know was... what failed exactly on my system? Was this really the SSD (most likely)? Or something else? Maybe the last time I swapped disks with the laptop I did not push the plug properly, and the connection came loose? Unlikely, but let's debug.
I started by installing smartmontools. That package provides smartctl, which allows
to query the drive SMART state, which generally contains useful debugging information.
Given that dpkg was bricked and could not install anything, I just installed the package semi-manually, by:
-
Mounting a tmpfs on /var/cache/apt, so writes in this directory would not touch the disk:
# mount -t tmpfs none /var/cache/apt/
-
Downloading the right package and version with:
# apt-get --download-only smartmontools
-
Opening the .deb manually:
 # cd /var/cache/apt/archives
 # ar xv ./smartmontools_6.2+svn3841-1.2_amd64.deb
 x - debian-binary
 x - control.tar.gz
 x - data.tar.xz
 # tar -xJf data.tar.xz
-
Finally running
smartctlfrom within that directory:# cd /var/cache/apt/archives/usr/sbin # ./smartctl -a /dev/sda
So, here finally I had smartctl. The first thing I did then
was to look at the status of the drive, with -a:
# ./smartctl -a /dev/sda

smartctl 6.2 2013-07-26 r3841 [x86_64-linux-3.11-2-amd64] (local build)
Copyright (C) 2002-13, Bruce Allen, Christian Franke, www.smartmontools.org

=== START OF INFORMATION SECTION ===
Model Family:     SandForce Driven SSDs
Device Model:     Corsair Force GS
Serial Number:    1234567
LU WWN Device Id: 0 000000 000000000
Firmware Version: 5.24
User Capacity:    360,080,695,296 bytes [360 GB]
Sector Size:      512 bytes logical/physical
Rotation Rate:    Solid State Device
Device is:        In smartctl database [for details use: -P show]
ATA Version is:   ATA8-ACS, ACS-2 T13/2015-D revision 3
SATA Version is:  SATA 3.0, 6.0 Gb/s (current: 6.0 Gb/s)
Local Time is:    Thu Sep 25 09:06:04 2014 PDT
SMART support is: Available - device has SMART capability.
SMART support is: Enabled

=== START OF READ SMART DATA SECTION ===
SMART overall-health self-assessment test result: PASSED

General SMART Values:
Offline data collection status:  (0x02) Offline data collection activity
                    was completed without error.
                    Auto Offline Data Collection: Disabled.
Self-test execution status:      (   0) The previous self-test routine completed
                    without error or no self-test has ever
                    been run.
Total time to complete Offline
data collection:        (    0) seconds.
Offline data collection
capabilities:            (0x79) SMART execute Offline immediate.
                    No Auto Offline data collection support.
                    Suspend Offline collection upon new
                    command.
                    Offline surface scan supported.
                    Self-test supported.
                    Conveyance Self-test supported.
                    Selective Self-test supported.
SMART capabilities:            (0x0003) Saves SMART data before entering
                    power-saving mode.
                    Supports SMART auto save timer.
Error logging capability:        (0x01) Error logging supported.
                    General Purpose Logging supported.
Short self-test routine
recommended polling time:    (   1) minutes.
Extended self-test routine
recommended polling time:    (  48) minutes.
Conveyance self-test routine
recommended polling time:    (   2) minutes.
SCT capabilities:          (0x0025) SCT Status supported.
                    SCT Data Table supported.

SMART Attributes Data Structure revision number: 10
Vendor Specific SMART Attributes with Thresholds:
ID# ATTRIBUTE_NAME          FLAG     VALUE WORST THRESH TYPE      UPDATED  WHEN_FAILED RAW_VALUE
  1 Raw_Read_Error_Rate     0x0033   120   120   050    Pre-fail  Always       -       0/0
  5 Retired_Block_Count     0x0033   100   100   003    Pre-fail  Always       -       0
  9 Power_On_Hours_and_Msec 0x0032   099   099   000    Old_age   Always       -       1288h+09m+57.740s
 12 Power_Cycle_Count       0x0032   100   100   000    Old_age   Always       -       774
171 Program_Fail_Count      0x000a   000   000   000    Old_age   Always       -       0
172 Erase_Fail_Count        0x0032   000   000   000    Old_age   Always       -       0
174 Unexpect_Power_Loss_Ct  0x0030   000   000   000    Old_age   Offline      -       507
177 Wear_Range_Delta        0x0000   000   000   000    Old_age   Offline      -       1
181 Program_Fail_Count      0x000a   000   000   000    Old_age   Always       -       0
182 Erase_Fail_Count        0x0032   000   000   000    Old_age   Always       -       0
187 Reported_Uncorrect      0x0012   100   100   000    Old_age   Always       -       0
194 Temperature_Celsius     0x0022   035   045   000    Old_age   Always       -       35 (Min/Max 13/45)
195 ECC_Uncorr_Error_Count  0x001c   120   120   000    Old_age   Offline      -       0/0
196 Reallocated_Event_Count 0x0033   100   100   003    Pre-fail  Always       -       0
201 Unc_Soft_Read_Err_Rate  0x001c   120   120   000    Old_age   Offline      -       0/0
204 Soft_ECC_Correct_Rate   0x001c   120   120   000    Old_age   Offline      -       0/0
230 Life_Curve_Status       0x0013   100   100   000    Pre-fail  Always       -       100
231 SSD_Life_Left           0x0013   100   100   010    Pre-fail  Always       -       0
233 SandForce_Internal      0x0032   000   000   000    Old_age   Always       -       1375
234 SandForce_Internal      0x0032   000   000   000    Old_age   Always       -       881
241 Lifetime_Writes_GiB     0x0032   000   000   000    Old_age   Always       -       512
242 Lifetime_Reads_GiB      0x0032   000   000   000    Old_age   Always       -       1342

SMART Error Log not supported

SMART Self-test Log not supported

SMART Selective self-test log data structure revision number 1
 SPAN  MIN_LBA  MAX_LBA  CURRENT_TEST_STATUS
    1        0        0  Not_testing
    2        0        0  Not_testing
    3        0        0  Not_testing
    4        0        0  Not_testing
    5        0        0  Not_testing
Selective self-test flags (0x0):
  After scanning selected spans, do NOT read-scan remainder of disk.
If Selective self-test is pending on power-up, resume after 0 minute delay.
By Googling around for a little bit and checking the Corsair forums, it seems like the important
fields to look at are Raw_Read_Error_Rate, the Retired_Block_Count, Reallocated_Event_count
and SSD_Life_Left. Note that sometimes you have to look at the 'VALUE' column, rather than the
'RAW_VALUE'. For example, SSD_Life_Left is 100% in this reading, and becomes a problem if it
gets below 10%.
I was expecting here to see damaged sectors or failed reads, as SSDs are known to only allow a certain number of writes per cell. I was expecting to see some relocated cells, or otherwise errors.
However, nothing showed up here: most of the counters looked normal, and everything seemed in good enough shape.
Notice also how low the Lifetime_Writes_GiB counter looked: if we average this out, I had gone through
each cell at most 2 times in a year, which should be far far below the limit of any modern SSD.
Most SMART capable disks, however, allow to run a self test to verify the integrity
and state of a disk. And that's exactly what I did next:
# smartctl -t long /dev/sda
smartctl 6.2 2013-07-26 r3841 [x86_64-linux-3.11-2-amd64] (local build)
Copyright (C) 2002-13, Bruce Allen, Christian Franke, www.smartmontools.org

=== START OF OFFLINE IMMEDIATE AND SELF-TEST SECTION ===
Sending command: "Execute SMART Extended self-test routine immediately in off-line mode".
Drive command "Execute SMART Extended self-test routine immediately in off-line mode" successful.
Testing has begun.
Please wait 48 minutes for test to complete.
Test will complete after Thu Sep 25 10:01:36 2014

Use smartctl -X to abort test.
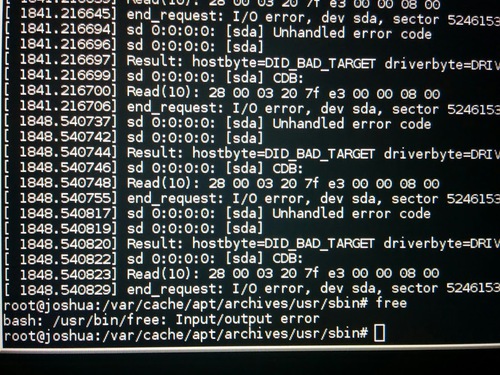
Right after I run this command, things started to go awry. Any read to the SSD would fail, things as simple as:
# free
bash: /usr/bin/free: Input/output error
would return error.
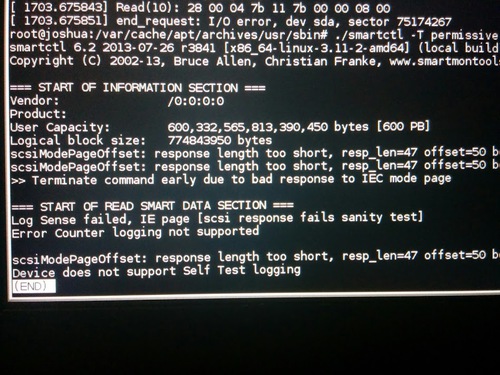
Running smartctl -a /dev/sda one more time would fail with parsing errors,
I had to use smartctl -T permissive -a /dev/sda to get an output similar to:
Vendor:   /0:0:0:0
Product:
Capacity: 600,332,565,813,390,450 [600 PB]
Logical block size: 774843950 bytes
...
Log sense failed, IE page [scsi response fails sanity test]
Error counter logging not supported
...
... response length too short ...
which seemed to indicate that the drive was responding with garbage to the SMART commands. Note the 600 peta bytes size, and response length too short, or the empty Vendor or Product string.
A reboot, however, brought back the drive to its original sorry state, with some files unreadable but most of the disk otherwise looking ok.
My conclusion was that starting a selftest was causing something in the firmware
or the drive to crash, and this is roughly when I decided to file a ticket with Corsair,
and ask for an RMA for the SSD.
Fixing the drive
Assessing the damage
Corsair was extremely fast at responding and providing guidance, and their suggestion was simple: upgrade the firmware, and run a secure erase before replacing the drive.
Upgrading the firmware was extremely painful: they do not seem to provide a linux upgrade utility, and the windows version... well, it requires Windows.
So, find a machine with Windows I could use, install the Corsair utilities for SSD support, connect the SSD, and upgrade the firmware (to version 5.24, in my case). A process that overall made me very uncomfortable, but was otherwise fairly simple.
Before doing a secure erase, however, I wanted to test if the new firmware provided any benefits, and sure it did.
First, linux was now failing much much faster. Instead of blocking for several seconds before spewing an error when stumbling upon a bad block I would get an error almost immediately.
Second, running smartctl -t long /dev/sda now did not brick the drive! Running
smartctl -a /dev/sda shortly after starting the test would show something like:
...
General SMART Values:
Offline data collection status:  (0x03) Offline data collection activity
                            is in progress.
                            Auto Offline Data Collection: Disabled.
Self-test execution status:      ( 249) Self-test routine in progress...
                            90% of test remaining.

...
... note the 90%, and the Self-test routine in progress text. So, I let it finish.
And sure enough, after a few seconds, it started reporting errors. To see the errors,
I had to run something like:
# smartctl -l xselftest /dev/sda
unfortunately I did not capture the output to paste it here. But this is what it looks like on my now healthy drive:
smartctl 6.2 2013-07-26 r3841 [x86_64-linux-3.11-2-amd64] (local build)
Copyright (C) 2002-13, Bruce Allen, Christian Franke, www.smartmontools.org

=== START OF READ SMART DATA SECTION ===
SMART Extended Self-test Log Version: 1 (1 sectors)
Num  Test_Description    Status                  Remaining  LifeTime(hours)  LBA_of_first_error
# 1  Extended offline    Aborted by host               10%      1288         -
# 2  Extended offline    Completed without error       00%      1264         -
# 3  Extended offline    Completed without error       00%      1210         -
When it found an error, it had a Status similar to detected errors, a number in
LBA_of_first_error indicating the sector with an error, and a Remaining of like '90%',
indicating that 90% of the drive still had to be scanned.
Being the kind of curious person I am, I wanted to know if there were any more damaged
sectors in the drive. I tried a few commands, like smartctl -t select,next /dev/sda,
or smartctl -t select,#of-lba-error+1, or smartctl -t select,cont. None of them
failed, but none of them caused the test to resume either.
Some forums suggested to use dd to overwrite the sector by computing its offset
and size manually, which would force the drive to relocate it, and the test
to continue. However, I believe my math was wrong: reading the sector before
overwriting it succeeded, leading me to believe I had computed the wrong sector
number.
I could have used a brute force kind of approach by running badblocks or
similar to find the list of broken sectors, and try to overwrite them manually.
But I decided there was not much point in doing so: the drive was clearly busted,
I had a good backup, and doing a secure wipe as suggested by Corsair seemed the
most sensible next step.
Secure wipe of the drive
Corsair suggested a secure wipe.
From my understanding of what I read around, SSDs have some sort of block mapper implemented in the firmware (or hardware) to spread the wear evenly and to keep track of which physical sector on the physical drive is mapped to the sector number used by the OS.
A secure wipe destroys and re-creates this data from scratch, basically
formatting this hidden file system that may have become corrupt.
Performing a secure wipe turns out is not as simple as it seems. I had to follow all the steps indicated in this wiki.
And beware, a secure wipe will, well, wipe all your data.
In short, here are the commands I had to run:
-
I had to put the laptop to sleep, and wake it up. Yep, not joking. Turns out that many BIOSes (including the one on the laptop I was using) put all the drives into
frozenstate (visible withhdparm -I /dev/sda) right after boot. In frozen state, there's not much you can do beside reading and writing data to the disk.A common trick to 'unfreeze' the drive is to put the laptop to sleep, and wake it up. The bios will not bother re-freezing the drive. So, run the command:
# echo -n mem > /sys/power/state
And then opened the lid to wake it up again.
-
I had to set a security password on the drive. Some forums suggested this was not necessary, as NULL was a perfectly fine password to provide when asked for one. But no, some drives require a real password being set, and my drive turned out to be one of those:
# hdparm --user-master u --security-set-pass foo /dev/sda
-
Finally, issued the secure wipe command:
# hdparm --user-master u --security-erase foo /dev/sda
Note that surprisingly this only took a few seconds to complete. Note also that at the end of the process, the password is forgotten, so you don't have to worry about unsetting it.
Sure enough, the drive was now empty: no partitions, and no data I could tell about.
Checking the drive, and restoring the data
So, did this really fix the drive? Or did the drive just forgot about all the bad sectors and unreadable data that was on it? Were all errors really gone?
Before closing my ticket with Corsair I wanted to be sure everything looked ok.
To verify the state of the drive, I tried a few things:
-
I run another selftest, with
smartctl -t long /dev/sda. 45 minutes later it completed without errors, which was exciting. -
I restored the
dddisk dump I had created earlier, and watched for errors. Restoring the dump caused each and every block to be written.To do so, I just re-run the
ddfrom earlier invertingifandof, while leaving error checking on:# dd of=/dev/sda if=./backup.img bs=104857600
-
Checked all the file systems for integrity, with
e2fsck -f /dev/sda3,e2fsck -f /dev/sda5, ... each and every partition.
The finishing touches
Restoring the partitions from the dd image I took when the drive was already failing meant two things:
-
That some files would contain garbage, as they could not be read when the backup was taken.
-
That the whole disk would be marked as used by the SSD, as each and every block was written by
dd. If you have paid attention to how SSDs work, you probably know that they need to be trimmed: they need to know which blocks are unused to ease the task of wear leveling and moving data around.
rsync
To solve the first problem I used rsync to compare the content of my disk
with a backup I had taken a week before.
The rsync command line looked something like:
# rsync -avz --delete --progress --checksum --itemize-changes --dry-run \
             --exclude=/run/ --exclude=/proc/ --exclude=/sys/ --exclude=/dev/ \
             --exclude=/var/lock/ --exclude=/mnt/ --exclude=/var/log/ \
             /mnt/backup /
The important options here are:
- --checksum
- Without this option,
rsyncwill only look at a file last modified date and size. Given thatddcorrupted the content, we wantrsyncto verify the content checksum. - --itemize-changes
- To ask
rsyncto show on screen which files it would overwrite, copy or delete, and why. - --dry-run
- To ask
rsyncto actually not do anything, just show the output as if it was actually running.
By piping the output to less and letting this command run for a few hours I obtained
had a nice list of the files that differed between my disk and the week old backup.
The list turned out fairly short: probably ~200 files, only a few of which I actually cared about. Most of the files were libraries or system files (apt-get, dpkg, logs): stuff I could easily re-install or restore from the backup.
Once I had the list of files I wanted to restore, it was easy: I just run rsync again with the list of files.
Trimming
Trimming was not hard either: I just had to run the command fstrim for each partition:
# for partition in /dev/sda{1,5,6,7}; do fstrim -v $partition; done;
and let it run.
Conclusion
I ended up closing the ticket with Corsair without asking for a replacement. The drive is back in shape, and seems to be working like a charm.
The real question now is how long can I trust this drive for? Will something like this happen again? My belief is that if it happened once, it will surely happen again. But this time around, I will be prepared.
Other posts
- From PDF to interactive map Let's say you are thinking about moving to Rome in the near future. Let's say you have family, and you want to find all daycares within 30 mins by pu...
- A simple way to generate snippets in python The Problem Let's say you want to add a search box to your web site to find words within your published content. Or let's say you want to display a l...
- Horizontal scrolling and you When it comes to HTML, CSS, and graphical formatting, I feel like a daft noob. Even achieving the most basic formatting seems to take longer than it ...
- Cleaning up a CSS Let's say you have a CSS with a few thousand selectors and many many rules. Let's say you want to eliminate the unused rules, how do you do that? I s...